Getting Started with ChipFlow
Welcome to ChipFlow! This guide will help you get started with the ChipFlow IC design platform, which simplifies the process of designing, testing, and manufacturing custom silicon.
What is ChipFlow?
ChipFlow is an integrated circuit design platform that combines modern hardware design tools with cloud-based manufacturing services. It enables you to:
Design custom silicon using Python and Amaranth HDL
Simulate and verify your designs
Prepare and submit your designs for manufacturing
Manage the entire IC design workflow from a single platform
Prerequisites
Before you begin:
Install the latest version of Python.
Ensure you have Git command line tools installed
We recommend Visual Studio Code as a development environment
GitHub Desktop is a great tool for workingh with Git repos
Clone chipflow-examples
Note
If you’re familiar with the Git command line then go clone ChipFlow/chipflow-examples <https://github.com/ChipFlow/chipflow-examples>, switch to the release branch <https://github.com/ChipFlow/chipflow-examples/tree/release>, and jump ahead to Install the Dependencies
If the git world is new to you, start up GitHub Desktop. The first time you launch it you will be asked to sign in or create an account - we recommend you take this moment to create a GitHub account if you don’t already have one!
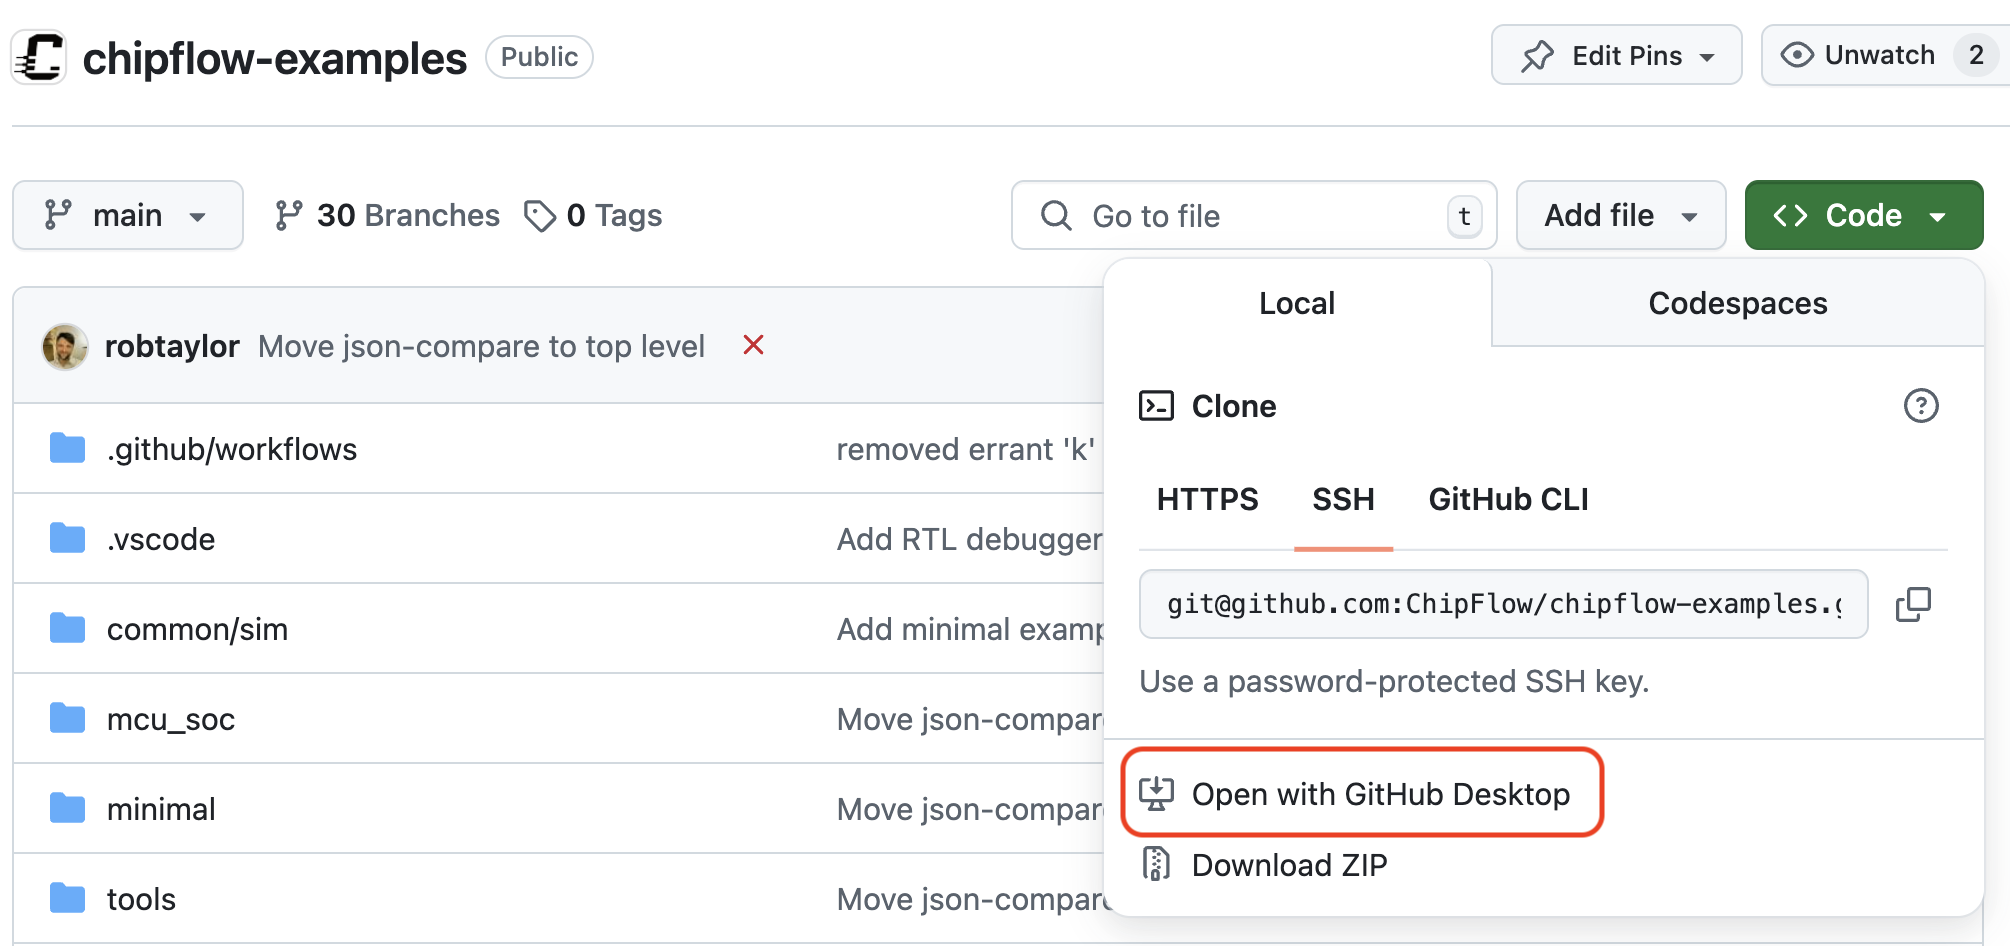
Navigate to the chipflow-examples repository release branch and click the green ‘Code’ button at the top. Select ‘Open with GitHub Desktop’ and then follow the prompts (N.B. your web browser may have a pop-up to authorise opening an external app)
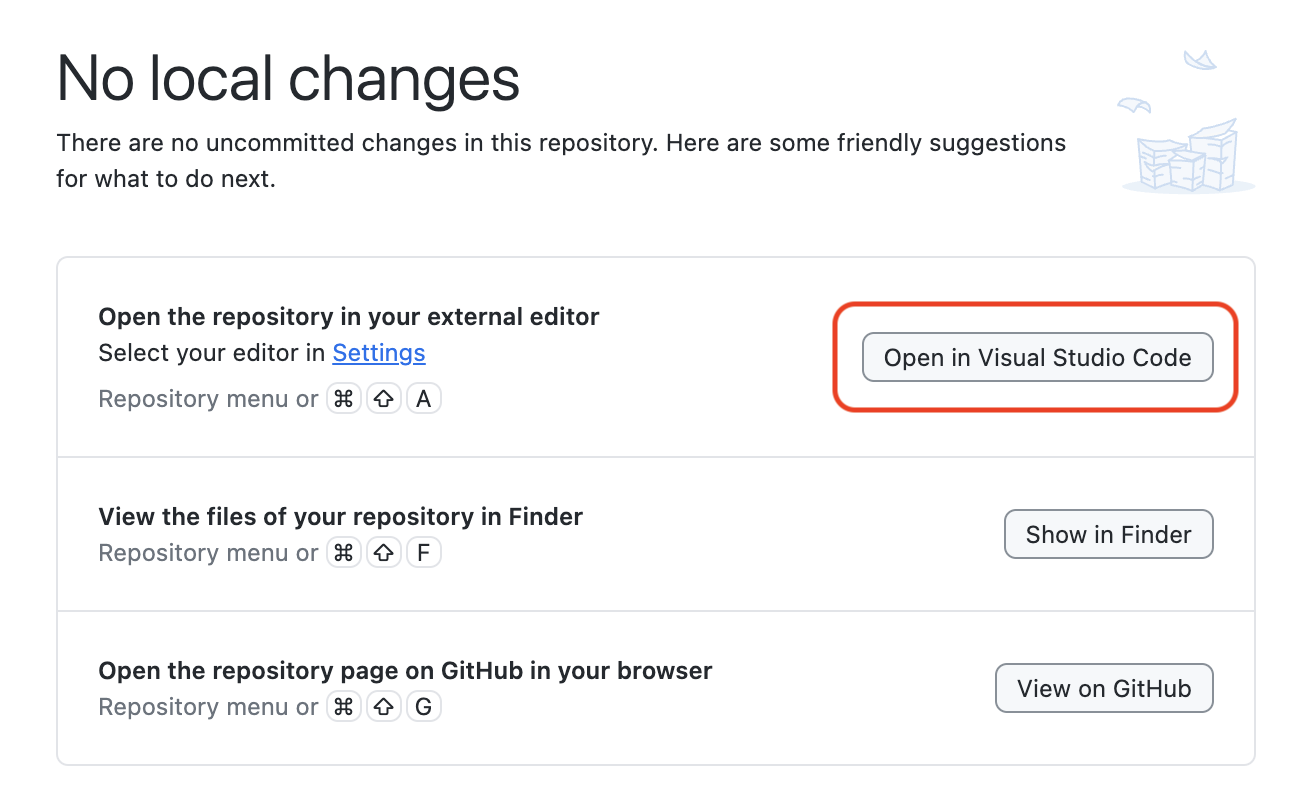
Once GitHub Desktop has cloned your repo you can click the button to open it in VS Code:
Install the dependencies
Note
In VS Code, open up a terminal by pressing Command-p: (Mac) or C-p (Windows/Linux).
We use PDM to manage our dependencies, so this will need to be installed. Follow the PDM install instructions for your OS.
Once PDM is installed, make sure you are in the chipflow-examples
directory and then run:
pdm lock -d
pdm install
Set up authentication
ChipFlow supports multiple authentication methods. Choose the one that works best for you:
Method 1: Using the CLI (Recommended)
The easiest way to authenticate is using the chipflow auth login command:
pdm run chipflow auth login
This will automatically:
Check if you have the GitHub CLI (
gh) installed and authenticatedIf yes, instantly authenticate using your GitHub token
If no, guide you through the device flow where you’ll authorize via your browser
Your API key will be saved locally for future use.
Method 2: Manual API key (Alternative)
If you prefer to manually manage your API key:
Go to https://build.chipflow.com/ and log in with your GitHub account
Click on the ‘User’ menu, then on ‘Create/Refresh API Key’
Your new API key will appear at the top

Image showing a newly generated API Key
Warning
Copy it now, as you will not see it again!
Create a file called
.envat the top level in thechipflow-examplesdirectory, containing:
CHIPFLOW_API_KEY=<Paste your key here>
To log out and remove saved credentials:
pdm run chipflow auth logout
Running a chip build
First choose a design to test. Here we will use the minimal design.
Change into the minimal directory in chipflow-examples to use
this design. Now we need to ‘lock’ our pins - the ChipFlow tooling will
then automatically allocate inputs and outputs from your design to pins
on the chip.
pdm run chipflow pin lock
We can now simulate and test the design by running:
make sim-check
You should see the simulation model being built and run - and a small test firmware running on the simulated System-on-a-Chip (aided by our local friendly cat!)
pdm run chipflow sim
-- build_sim_cxxrtl
-- build_sim
pdm run chipflow software
-- gather_depencencies
-- build_software_elf
-- build_software
cd build/sim && ./sim_soc
🐱: nyaa~!
SoC type: CA7F100F
Flash ID: CA7CA7FF
Quad mode
pdm run json-compare design/tests/events_reference.json build/sim/events.json
Event logs are identical
Now you are ready to try building this design into a chip! To submit your design to ChipFlow Platform where it will be built into GDS, run:
pdm run chipflow silicon submit
This should return something like:
INFO:chipflow.steps.silicon:Submitting c23dab6-dirty for project chipflow-examples-minimal
INFO:chipflow.steps.silicon:Submitted design: {'build_id': '3f51a69c-b3e3-4fd3-88fd-52826ac5e5dd'}
Design submitted successfully! Build URL: https://build.chipflow.com/build/3f51a69c-b3e3-4fd3-88fd-52826ac5e5dd
Your design will now start building: pictures and logs of the build are available at build URL that is returned, once it is complete.
If you would like to get the build logs streamed to your command-line, you can instead call:
pdm run chipflow silicon submit --wait